How to Sew Reflective Piping on Workwear: A Manufacturer’s Guide
Reflective piping may look like a narrow trim, but in professional workwear production it is a safety component, a durability test, and a brand promise stitched into one seam.
Table of Contents
Quick Answer: How Should Manufacturers Sew Reflective Piping on Workwear?
To sew reflective piping on workwear correctly, position the piping cord or folded reflective edge between the garment panels or along the seam allowance, secure it with clips instead of excessive pins, use a zipper foot or piping foot to stitch close to the cord without crushing the reflective surface, and select UV-resistant bonded polyester or nylon thread matched to the garment’s wash and weather exposure. For most woven workwear, manufacturers should test 8–12 stitches per inch, adjust tension to prevent puckering, use a ballpoint or microtex needle depending on the fabric, and keep the reflective face clean, unperforated and evenly exposed. On waterproof jackets or rainwear, minimize needle holes, control seam allowance, and apply seam sealing where required. Every production lot should be checked for stitch density, seam strength, reflective exposure width, wash durability, and compliance with standards such as EN ISO 20471 or ANSI/ISEA 107 before bulk shipment.
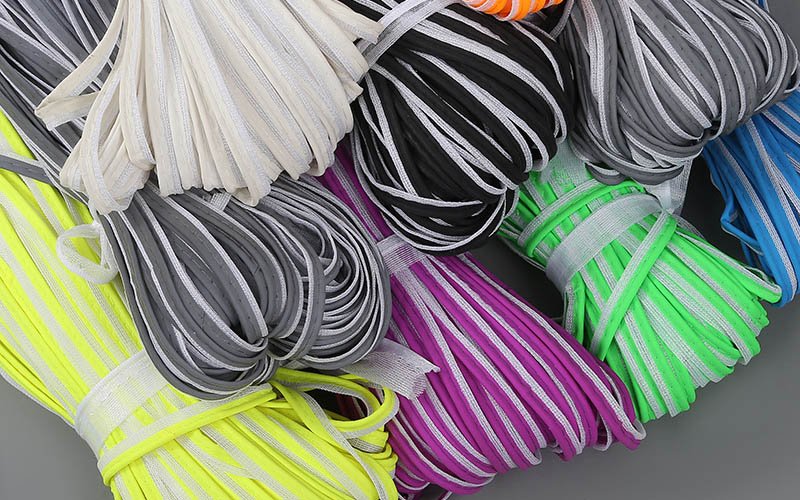
If your brand is sourcing at scale, the piping itself matters as much as the sewing process. A stable, washable, high-brightness material from a reliable reflective piping manufacturer reduces the risk of audit failure, production rework and customer complaints after industrial laundering.
Why Sewing Reflective Piping Is Not “Just a Trim”
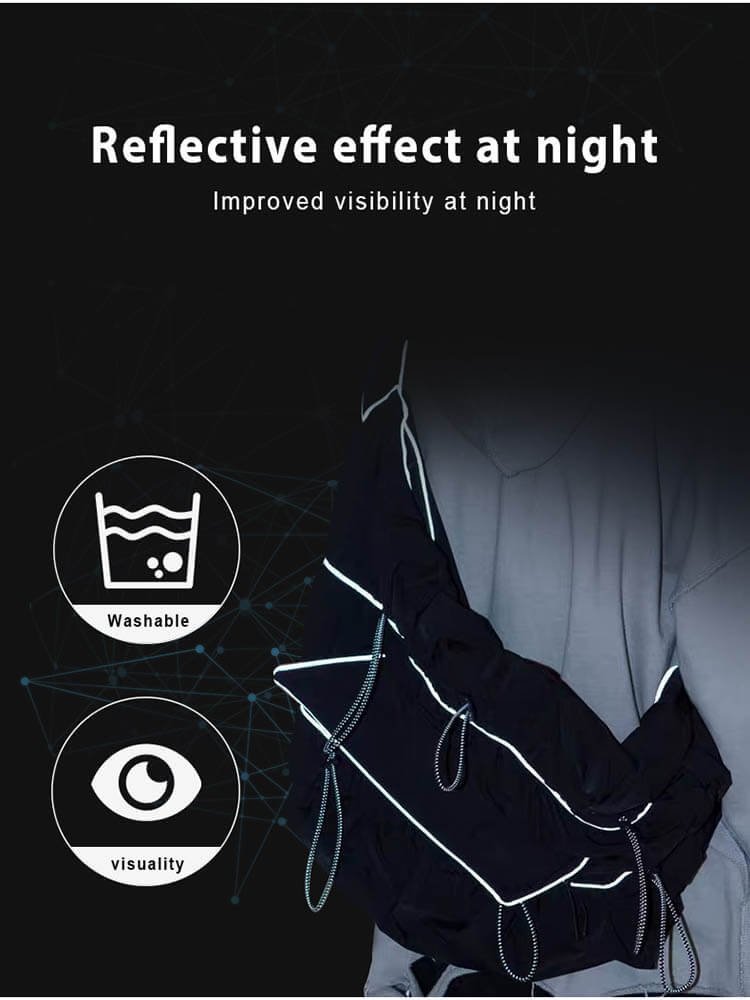
In factory discussions, reflective piping is sometimes treated as a decorative finishing detail. That is a dangerous shortcut. On real job sites—road construction, rail maintenance, logistics yards, utilities, mining, emergency response and rainy night operations—reflective piping helps outline the worker’s shape when headlights hit the garment from side angles. It improves motion recognition, especially on sleeves, trouser side seams, shoulders and jacket backs.
From a manufacturer’s perspective, piping is also one of the first places where poor sewing discipline becomes visible. A crooked line on a pocket may be tolerated by some customers. Detached reflective piping on a certified safety jacket is a compliance risk. Incorrect SPI can reduce stretch recovery, distort fit or create weak perforation lines. Cheap thread can degrade under ultraviolet exposure. An unsuitable needle can damage a waterproof membrane. Excessive foot pressure can flatten the piping and reduce its appearance. These issues do not always show up during first sample approval; they often appear after 20, 30 or 50 industrial wash cycles.
In high visibility workwear manufacturing, every stitch around reflective piping is part of the safety chain. When that stitch fails, the product promise fails with it.
For brands exporting to Europe, North America and Australia, this is not only an aesthetic issue. Buyers may request proof of performance against standards. For background reading, review the European high-visibility clothing framework from ISO’s EN ISO 20471 information, the North American requirements from ISEA’s ANSI/ISEA 107 overview, and garment testing principles from ASTM International.
Before Sewing: Choose the Right Piping, Thread, Needle and Machine Setup
1. Reflective Piping Type
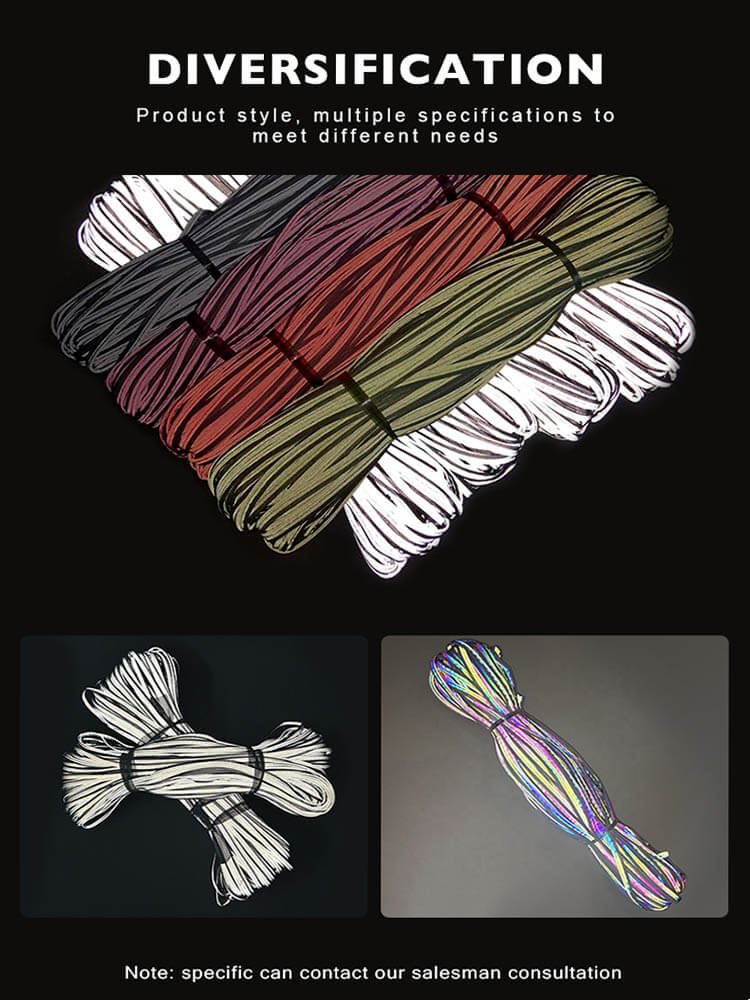
Reflective piping is usually made by combining reflective material with a textile backing and sometimes a corded center. For workwear, the backing must match the garment’s intended use. A rain jacket needs flexible, water-resistant piping. A winter jacket needs piping that remains stable in cold conditions. Stretch workwear requires piping that does not restrict movement or deform after repeated bending. FR garments require flame-retardant compatible components rather than ordinary reflective trim.
2. Thread Selection
Thread is one of the most underestimated decisions in piping attachment. Standard low-cost polyester may be acceptable for promotional garments, but industrial workwear requires stronger thinking. Bonded polyester thread is widely used because it offers good UV resistance, abrasion resistance and wash performance. Bonded nylon provides strength and elasticity but may not be ideal for prolonged UV exposure unless specified accordingly. For garments expected to face sunlight, rain, oil, dirt and industrial laundering, request thread data instead of relying on supplier habit.
If the finished garment will be tested after multiple washes, the thread must survive the same conditions as the reflective material. A strong reflective piping tape is useless if the seam thread breaks first. Manufacturers should align thread specifications with wash requirements, garment category and customer compliance claims.
3. Needle Type
Needle selection depends on the base fabric. For woven polyester-cotton workwear, a sharp or microtex needle may create a clean penetration. For knits, stretch fabrics or softshell materials, a ballpoint or stretch needle helps avoid yarn cutting. For waterproof laminated fabrics, the priority is reducing membrane damage while maintaining seam strength. Use the smallest needle size that still supports the required thread and seam strength. Always run tests on actual bulk fabric, not only on sample room leftovers.
4. Presser Foot and Machine
A piping foot or zipper foot gives better control because it allows the operator to sew close to the cord without riding over the raised edge. For bulk production, folders and guides can improve consistency. Walking-foot machines are useful for thicker jackets, padded workwear and multi-layer seams because they reduce layer shifting. The goal is not simply to attach the piping; the goal is to keep it straight, evenly exposed and strong through the garment’s service life.
Step-by-Step: How to Sew Reflective Piping on Workwear
Step 1: Pre-test the Piping
Before cutting production fabric, check piping width, brightness, backing stability, color consistency and roll tension. Measure the exposed reflective area after folding or insertion. Confirm that the piping does not crack when bent around curves.
Step 2: Mark Placement
Mark the seam line and exposure line clearly. On certified workwear, visibility layout matters. Reflective elements should support body recognition and not be hidden inside bulky seams, pocket flaps or dark contrast panels.
Step 3: Clip, Do Not Over-Pin
Use clips where possible, especially on waterproof fabrics. Pins create unnecessary holes and can scratch reflective surfaces. If pins are unavoidable, keep them inside the seam allowance.
Step 4: Baste or First Stitch
For complicated curves, shoulders and pocket edges, a first securing stitch helps prevent movement. This is especially useful when sewing slippery rainwear fabric or thick winter jacket panels.
Step 5: Join the Main Seam
Place the second garment panel over the piping, align seam allowances, and stitch with a piping foot. Keep the needle close enough to hold the piping firmly but not so close that it crushes the cord or distorts the reflective face.
Step 6: Inspect Immediately
Inspect the seam before moving to the next operation. Check exposure width, skipped stitches, puckering, twisted piping, loose ends and surface scratches. Early correction is cheaper than repairing finished garments.
For bulk production, create a sewing standard card for each style. Include piping code, needle size, thread type, SPI range, seam allowance, machine type, operator notes and approved photos. This prevents the common problem where sample room quality is approved but production line interpretation changes from operator to operator.
Special Case: Sewing Reflective Piping on Waterproof or Stretch Workwear
Waterproof hi-vis jackets and rain suits create a different challenge. Every needle penetration can become a potential leakage point. If reflective piping is inserted into a seam on rainwear, the factory should evaluate whether seam sealing tape can fully cover the stitch line on the inside. The seam must be flat enough for tape adhesion, and the piping bulk must not prevent a proper seal.
On stretch workwear, the issue is not water but movement. Incorrect stitch density can create a rigid seam that fights the garment’s elasticity. Too many stitches may perforate the fabric and reduce recovery. Too few stitches can weaken the seam. This is why SPI should be tested on the actual fabric and piping combination. Do a stretch recovery test after sewing, then repeat after washing.
Manufacturers working with waterproof breathable fabrics may benefit from reviewing technical guidance from GORE-TEX fabric technology resources or care and laundering expectations from organizations such as CINET professional textile care. These resources help production teams understand why seam durability and wash performance must be engineered together, not handled as separate departments.
Manufacturer’s QC Checklist for Reflective Piping
| QC Item | What to Check | Common Failure |
|---|---|---|
| SPI | Confirm stitch density against approved sample and fabric type. | Too tight, poor stretch, seam puckering. |
| Thread | Verify thread type, strength, color and UV/wash resistance. | Thread degradation after laundering or sunlight exposure. |
| Needle Damage | Inspect fabric around stitch holes and membrane condition. | Leakage, yarn cutting, seam weakness. |
| Reflective Exposure | Measure visible reflective width after sewing. | Piping buried too deeply inside seam. |
| Seam Strength | Pull test or lab test based on buyer requirements. | Detachment during use or wash. |
| Appearance | Check straightness, smooth curves, no twisting or stains. | Rejected visual inspection or brand complaint. |
For serious export orders, QC must include both inline inspection and final inspection. Inline inspection catches operator issues early. Final inspection verifies the complete garment. For certified programs, random wash testing is a wise investment, especially before shipping large container orders. For additional safety context, the OSHA PPE guidance is useful for understanding why visibility garments sit within a broader worker protection system.
How Proper Sewing Reduces Production Bottlenecks
Good piping sewing is not only about safety compliance. It also affects cost-per-garment. When reflective piping twists, shifts or puckers, operators slow down, supervisors intervene, and rework piles up. If the process is not standardized, each line develops its own method. That may be acceptable for small workshop orders, but it is risky for multi-style, multi-country export programs.
A manufacturer can improve efficiency by preparing pre-cut piping lengths, using seam guides, training operators on curves and corners, and separating difficult operations from high-speed straight seams. For example, long trouser side seams can often be guided efficiently, while shoulder curves, storm flaps and pocket openings require slower handling. The line balance should reflect that reality.
Another practical point: never approve a production method based only on one perfect sample. Run a pilot lot. Include different garment sizes because piping behaves differently around small and large curves. Wash several pieces. Inspect after drying. If the piping edge waves, if the seam becomes rigid, or if the reflective layer shows cracking, solve it before bulk cutting begins.
At VizGlo Safety, we treat reflective piping as part of an integrated workwear system. Our vertical supply capability covers reflective materials and finished hi-vis garments, helping distributors, private labels and corporate buyers reduce mismatch problems between trim, fabric, sewing technique and compliance targets. If you are developing a custom workwear line and need stable wholesale reflective piping for jackets, rainwear, trousers, vests or uniforms, selecting the right material at the design stage is much cheaper than correcting failures after production.
Need Reflective Piping That Sews Cleanly and Survives Real Workwear Use?
VizGlo Safety supports OEM/ODM workwear brands with reflective piping, reflective tapes, custom reflective materials and finished hi-vis garments. Tell us your fabric, market standard, wash requirement and application position—we can help you select and test the right solution.
Request a Custom Piping SampleWordPress/Elementor note: this button uses your popup ID 26 action link.
Final Manufacturer’s Advice
If you remember only one thing from this guide, remember this: reflective piping must be engineered into the garment, not added at the end as decoration. The right piping, thread, needle, stitch density, foot pressure and QC process work together. A beautiful sample means little if the bulk line cannot repeat it. A strong seam means little if the reflective surface is hidden. A compliant material means little if the sewing thread fails after washing.
For brands, distributors and importers, the safest approach is to involve your reflective material supplier early. Share the target market, standard, fabric composition, laundering expectation and garment design. That is how you avoid the costly surprises that lead to rejected shipments, failed audits and damaged customer trust.
FAQ: Sewing Reflective Piping on Workwear
What stitch per inch is best for reflective piping?
Many woven workwear styles perform well around 8–12 SPI, but the correct range depends on fabric weight, stretch, piping construction, thread and seam strength requirements. Always test on bulk fabric and confirm after washing.
Can I use regular polyester thread for reflective piping?
Regular polyester thread may work for light-duty garments, but professional workwear should use thread selected for UV exposure, abrasion and laundering. Bonded polyester is commonly used for durable outdoor workwear.
Should reflective piping be sewn before or after joining garment panels?
In many constructions, reflective piping is first positioned or basted onto one panel, then the second panel is joined over it. This gives better control of exposure width and seam alignment.
How do you sew reflective piping on waterproof jackets?
Use minimal needle damage, correct seam allowance, suitable needle and thread, and confirm that seam sealing can cover the stitch line. Test leakage and wash durability before bulk production.
Why does reflective piping detach after washing?
Common reasons include weak thread, incorrect stitch tension, poor seam allowance, unsuitable piping backing, excessive fabric stretch, harsh industrial washing or lack of compatibility testing between material and garment.