How to Test the Reflectivity and Durability of Your Custom Logos
A comprehensive guide to verifying logo quality, measuring retroreflectivity, and ensuring compliance with international safety standards
Testing reflective logos isn’t a cosmetic quality-check—it’s a safety and business critical function that separates professional manufacturers from cut-rate suppliers. Whether you’re a procurement manager, safety officer, or private label brand, understanding how to verify logo quality protects both your workers and your bottom line. A defective reflective logo isn’t just a minor flaw; it’s a potential liability that can render an entire batch of certified EN ISO 20471 or ANSI/ISEA 107 garments non-compliant, forcing expensive reworking and damaging your brand reputation.
This guide walks you through practical testing methods, industry standards, and inspection protocols used by leading manufacturers and procurement professionals worldwide. We’ll show you how to shift your thinking from “cost-per-logo” to “cost-per-wash” and ensure your custom logos perform reliably over the entire lifespan of your safety apparel.
Why Testing Matters: Beyond Visual Inspection
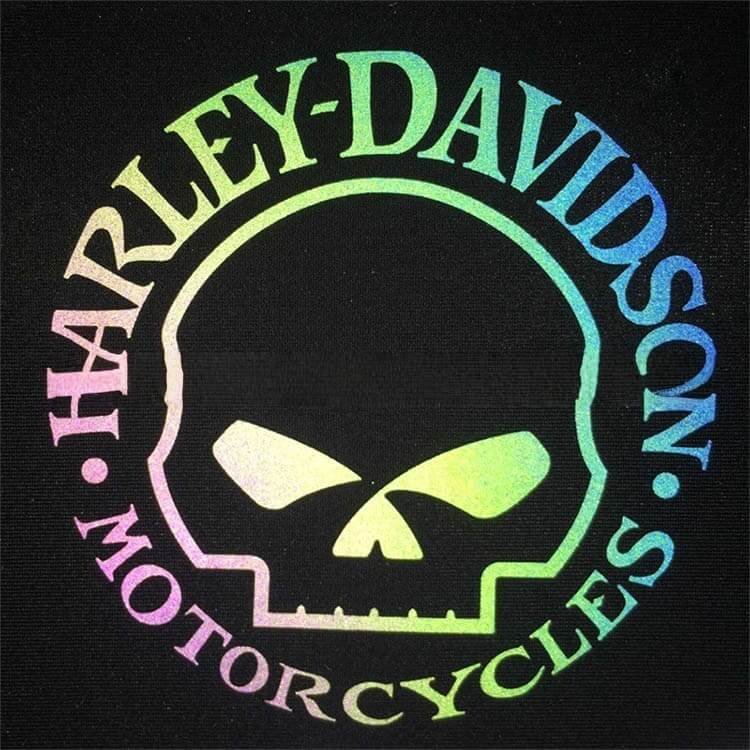
Many procurement teams make a critical mistake: they treat custom logo application as a simple printing service. They focus on visual appeal—”Does the logo look sharp?”—and price. This myopic approach ignores a harsh reality: a logo that looks perfect today can fail retroreflectivity measurements within three months of field use.
⚠️ The Hidden Cost of Poor Testing
I’ve worked with clients who chased the lowest logo price, only to receive a container of 10,000 garments where the logos cracked and peeled after three industrial laundry cycles. The cost to rework: $8,000–$15,000, plus expedited shipping, plus the reputational damage of delaying customer orders. The “savings” they thought they gained multiplied into catastrophic losses.
The core issue: retroreflectivity degradation isn’t always visible. A logo can maintain its appearance while its retroreflective properties (the ability to bounce light back to vehicle headlights) plummet below safety-critical thresholds. Workers remain at risk, and your organization faces liability exposure.
Proactive testing—conducted before bulk production—identifies quality gaps early, when corrections are inexpensive. This article teaches you how to implement that protective layer.
Understanding Retroreflectivity: The Science Behind Safety
Retroreflectivity is a material’s ability to return light to its source—a physics principle that everything in safety apparel depends on. When a driver’s headlights hit a worker’s reflective logo at night, retroreflective technology bounces that light directly back toward the driver, making the worker visible.
📊 Key Metric: Coefficient of Luminous Intensity (cd/lux/m²)
This measures how much light a reflective material bounces back per unit of illumination received. Higher values = greater visibility at distance.
- •500+ cd/lux/m² = Safe for night driving in most conditions
- •200–500 cd/lux/m² = Acceptable but reduced visibility margin
- •<200 cd/lux/m² = Dangerously inadequate; fails compliance

Retroreflectivity degrades over time due to:
- • UV Exposure – Sunlight degrades the optical structure and adhesive bonds
- • Thermal Stress – Industrial washing (60–95°C cycles) weakens heat-transfer bonds
- • Mechanical Abrasion – Friction from washing tumblers and contact wear
- • Poor Adhesion – Low-quality application leads to premature peeling and separation
Premium manufacturers test for all these failure modes. Budget suppliers skip this step, betting that logos will last long enough to avoid complaints. That bet often fails—to your detriment.
International Standards & Compliance Requirements
Safety logos don’t exist in a vacuum. They’re integral components of certified safety garments governed by strict international standards. Understanding these standards is essential for procurement and ensures your investment meets legal requirements.
🇪🇺 EN ISO 20471 (Europe)
- Class 1: 500 cd/lux/m² minimum
- Class 2: 500 cd/lux/m² minimum
- Class 3: 500 cd/lux/m² minimum (highest visibility)
- Legally required in UK, EU, and most EMEA regions
🇺🇸 ANSI/ISEA 107 (North America)
- Type O: High-visibility retroreflective trim
- Type R: Reflective material (fluorescent + retroreflective)
- Type P: Retroreflective material
- Adopted by OSHA and many U.S. government agencies
Critical Point: A garment certified to EN ISO 20471 can become non-compliant if its logos degrade below the minimum retroreflectivity threshold. Your liability doesn’t end at purchase—it extends through the garment’s working life. Poor-quality logos introduce risk that extends your legal exposure.
Learn more about reflective logo standards and compliance by exploring our comprehensive reflective logo solutions, which are engineered to maintain compliance throughout their lifecycle.
Professional Testing Methods: Measuring Retroreflectivity
Now, let’s move from theory to practice. Here are the standard, industry-proven methods used by safety product labs, manufacturers, and quality assurance teams to verify reflective logo performance.
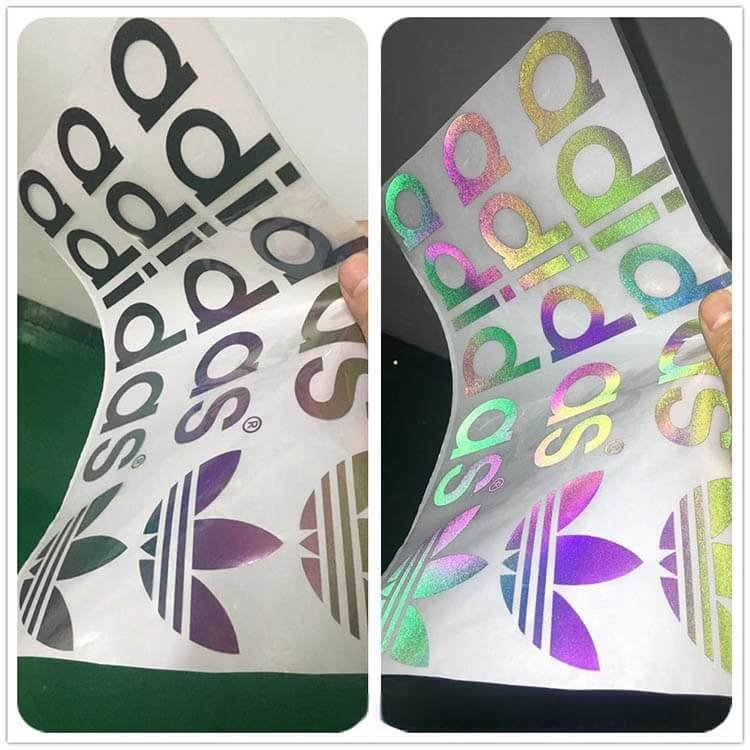
1. Retroreflectometer Testing (Laboratory Standard)
What it measures: The intensity of light reflected back to the light source at specific angles (typically 0.2°, 0.5°, and 1.5° observation angles).
Equipment cost: $15,000–$40,000 for certified retroreflectometers (like BYK-Gardner systems).
Standard procedure:
- 1. Place logo sample flat on retroreflectometer
- 2. Set light source and observation angle (0.2° is most critical)
- 3. Record cd/lux/m² reading; repeat 5 times across different logo areas
- 4. Average the readings; compare against standard minimums
Pass criteria: All readings ≥ 500 cd/lux/m² at 0.2° observation angle.
2. Flashlight Field Test (Quick, On-Site Check)
What it measures: Relative brightness—informal but useful for rapid quality gates.
Equipment needed: Flashlight (500+ lumens recommended), darkened room, reference sample (known-good logo).
Procedure:
- 1. Dim the room to near-darkness
- 2. Shine flashlight at ~45° angle on test logo
- 3. Compare brightness against a reference (certified) sample
- 4. Test sample should match or exceed reference brightness
Limitations: Subjective; useful for pass/fail gates but not for precise measurement. Never rely solely on this method for compliance decisions. Always follow up with retroreflectometer testing.
3. Goniometer Testing (Angular Performance)
What it measures: How retroreflectivity changes at different observation angles (critical for real-world scenarios where drivers approach garments at varying angles).
Why it matters: A logo might perform well at one angle but fail at others. Goniometric testing captures this variability.
Standard test angles: 0.2°, 0.5°, 1.5°, and 2.5° observation angles. Real-world vehicle headlight approach angles typically range from 0.5° to 2°.
Professional Recommendation: For high-volume orders, conduct retroreflectometer testing on at least 10 sample logos per batch before approving full production. This early-gate approach costs $500–$1,000 but eliminates the risk of 10,000-unit failures.
Durability Testing: Will Your Logos Survive Real-World Conditions?
Even if a logo displays excellent retroreflectivity on day one, it means nothing if it fails after three laundry cycles. Durability testing ensures your logos withstand the environmental stresses they’ll encounter in the field.
1 Industrial Wash Test (ISO 6330)
Standard protocol: 30–50 industrial washing cycles at 60–95°C (temperature depends on garment fabric requirements).
What to measure:
- • Retroreflectivity degradation (should lose no more than 15–20%)
- • Visual cracking, peeling, or edge lifting
- • Color fading or discoloration
- • Adhesion strength (logo should not separate from substrate)
⚠️ Reality Check: Poor logos fail this test within 5–10 cycles. Premium logos pass 40+ cycles with minimal degradation.
2 Accelerated Fading Test (UV Exposure)
Standard: ASTM G154 (Xenon arc or fluorescent UV lamp exposure for 1000+ hours).
Simulates: 2–3 years of outdoor sun exposure in a compressed timeline.
Measurement: Record retroreflectivity before and after UV exposure. Acceptable degradation: no more than 20–30%.
💡 Tip: If logos fail UV testing, they’ll become liability risks within 6 months of outdoor use. Choose premium formulations with UV-stabilized adhesives.
3 Adhesion Strength Test (Peel Test)
Standard: ASTM D3359 (Cross-hatch adhesion test).
Method: Apply logo to substrate; cut parallel lines through the logo; apply and remove tape; visually rate adhesion loss.
Scale:
- • 5B: No removal (excellent adhesion) ✅ PASS
- • 3B–4B: Minor chipping (acceptable)
- • <3B: Significant removal (fail) ❌
Premium heat-transfer logos consistently achieve 5B; budget alternatives often score 2B–3B.
4 Cracking Resistance Test (Flex & Elongation)
Simulates: Workers bending, stretching, and moving in garments during actual work.
Procedure: Apply logos to fabric; repeatedly stretch and flex the garment (typically 1000+ cycles at 5–10% elongation).
Measurement: Examine logos under magnification for micro-cracks, visible cracking, or separation.
🔍 Critical Point: Micro-cracks degrade retroreflectivity rapidly even if they’re not visually obvious. Flexible adhesives and thin logo films perform better than rigid materials.
Field Verification: Practical On-Site Testing
Laboratory testing is essential, but field verification adds another layer of confidence. Here are practical methods to check logos in real-world conditions and ensure they’re performing as expected.
Night-Driving Visibility Test
The simplest reality check: Have workers wear garments at night and observe visibility from a moving vehicle at 50+ km/h (30+ mph). Can the driver clearly see the logos at 50 meters? At 100 meters?
Standards reference: EN ISO 20471 requires visibility at ≥100 meters under standard vehicle headlight geometry. If your field test shows visibility only at 50 meters, logos are borderline non-compliant.
Additional field verification methods:
-
✓
Month-by-month retroreflectimeter checks: Test logos on actual garments in use at 1, 3, and 6-month intervals. Track retroreflectivity degradation curves. If degradation accelerates unexpectedly, source quality is likely the issue.
-
✓
Laundry cycle tracking: Partner with your industrial laundry service. Send duplicate garments to be washed, and test retroreflectivity after 10, 25, and 50 cycles. Compare degradation against laboratory predictions.
-
✓
Visual inspection protocols: Establish a monthly checklist for workers/supervisors to report peeling, cracking, or discoloration. Document findings; treat complaints as early warning signals.
Pro tip: VizGlo Safety’s custom reflective logo solutions include lifetime technical support. We help you establish field verification protocols and can provide replacement testing throughout your garment lifecycle.
Ensure Logo Quality with Professional Testing
Don’t let logo failures compromise worker safety or damage your brand. Our team of reflective material experts can guide you through professional testing protocols and help you select logos that pass rigorous durability standards.
Get Testing & Quality Consultation →Frequently Asked Questions
What is retroreflectivity and why does it matter for safety logos? ›
Retroreflectivity is the ability of a material to reflect light back to its source. For safety logos, this property ensures visibility at night when vehicle headlights hit the material—the light bounces directly back toward the driver, making workers visible. It’s measured in candelas per lux per square meter (cd/lux/m²). International standards like EN ISO 20471 (Europe) and ANSI/ISEA 107 (North America) mandate minimum 500 cd/lux/m² for compliant safety wear. Without proper retroreflectivity, worker visibility drops dramatically in low-light conditions, creating dangerous liability.
What are the minimum retroreflectivity standards I need to meet? ›
The global standards are:
- • EN ISO 20471 (Europe): Minimum 500 cd/lux/m² at 0.2° observation angle for all classes
- • ANSI/ISEA 107 (North America): Similar 500+ cd/lux/m² requirements; adopted by OSHA and U.S. government agencies
- • AS/NZS 1906.4 & 4602.1 (Australia/New Zealand): 500 cd/lux/m² minimum
These aren’t guidelines—they’re legal minimums in most regions. Any logo below 500 cd/lux/m² could make your entire garment non-compliant, exposing you to liability.
How do I know if my logos will pass durability tests? ›
Quality logos should withstand 30–50+ industrial wash cycles at 60–95°C with minimal retroreflectivity loss (<15–20% degradation acceptable). To verify:
- 1. Request durability test reports from your supplier (ISO 6330 wash tests, ASTM G154 UV exposure)
- 2. Conduct your own accelerated wash tests on samples before bulk production
- 3. Monitor retroreflectivity on garments in actual use at 1, 3, and 6-month intervals
- 4. Poor logos fail these tests within 5–10 cycles; premium quality passes 40+ cycles with minimal loss
What’s the real cost difference between testing and fixing logo failures? ›
Retroreflectometer testing: $200–$500 per batch for laboratory measurement of 10–20 samples.
Cost of fixing a failed container (10,000 garments): $5,000–$15,000+ in rework, expedited shipping, and customer delays. Plus immeasurable reputational damage.
ROI: Every dollar spent on proactive testing saves $10–$30 in failure costs. Testing is not an expense—it’s insurance.
Can I just inspect logos visually? Do I really need expensive equipment? ›
No. Visual inspection alone is dangerously inadequate because retroreflectivity degradation isn’t always visible to the naked eye. A logo can look perfect while its retroreflective performance has dropped 30–40% below safe thresholds. A flashlight test is a useful quick-gate but not a compliance tool.
Best practice: Use visual inspection for initial quality gates, then always follow up with professional retroreflectometer testing for final batch approval. The small investment in equipment rental ($500/test) or lab services prevents catastrophic failures.
What causes retroreflectivity to degrade over time? ›
Multiple factors accelerate degradation:
- • UV Exposure: Sunlight degrades the optical prism structure and weakens adhesive bonds
- • Thermal Stress: Industrial washing at 60–95°C repeatedly heats and cools the logo, causing adhesive failure
- • Mechanical Abrasion: Washing tumbler friction and contact wear erode the reflective surface
- • Poor Adhesion: Low-quality application allows logos to separate prematurely, accelerating failure
Premium manufacturers test for all these modes. Budget suppliers gamble that logos will last long enough to avoid complaints—a bet that often fails.
Related Resources on Reflective Materials
Logo testing is just one aspect of comprehensive reflective material quality assurance. Explore our complete reflective solutions to understand how premium materials and professional manufacturing practices combine to create durability and compliance:
Conclusion: Testing is Your Safety Net
Testing reflective logos isn’t optional—it’s a foundational business practice that protects workers, ensures compliance, and saves money. The conversation must shift from “What’s the lowest price?” to “What’s the total cost of ownership, including failure risk?”
Here’s what we know from 15 years in this industry:
- • Organizations that invest in upfront testing never experience container-load failures
- • Field visibility issues rarely result from manufacturer defects when logos are tested before production
- • Professional testing creates accountability through documentation—critical if safety incidents occur
- • Suppliers who embrace testing standards earn loyalty; those who cut corners lose customers (eventually)
Your action plan: Before your next custom logo order, ask your supplier for retroreflectometer test reports, durability test results (ISO 6330 wash tests, ASTM G154 UV exposure), and adhesion strength data. If they can’t provide documentation, they’re not taking quality seriously. Period.
Ready to ensure your custom logos meet the highest standards? Contact our reflective material experts today. We’ll guide you through professional testing protocols, help you select materials that pass rigorous durability standards, and ensure your logos remain compliant throughout their working life. Your workers’ safety—and your brand integrity—deserve nothing less.
External References & Standards Resources
- • EN ISO 20471:2013 – High-Visibility Warning Clothing (European standard for safety apparel)
- • ANSI/ISEA 107 – High-Visibility Safety Apparel (North American compliance standard adopted by OSHA)
- • ASTM D3359 – Adhesion Testing Standards (Cross-hatch adhesion test for reflective materials)
- • ASTM G154 – UV/Weathering Accelerated Testing (Accelerated fading and UV resistance evaluation)
- • ISO 6330 – Industrial Wash Test Procedures (Standard protocol for evaluating garment durability through washing)
- • BYK-Gardner Retroreflectometer Systems (Industry-leading retroreflectivity measurement equipment)
- • OSHA High-Visibility Apparel Requirements (Regulatory compliance guidelines for U.S. workplaces)
Partner with VizGlo Safety for Premium Reflective Logos
Every custom logo we produce undergoes rigorous retroreflectivity and durability testing. Discover how professional-grade reflective materials and expert manufacturing transform your safety apparel into reliable, compliant, worker-protective gear.